Chart editor manual
This page represents manual for chart editor. It is a tool that can be used to create custom songs. It allows users to paste URL of a YouTube video and start to create chart based on it.
Table of contents:
User interface
After opening chart editor, it should look similar to the image below.
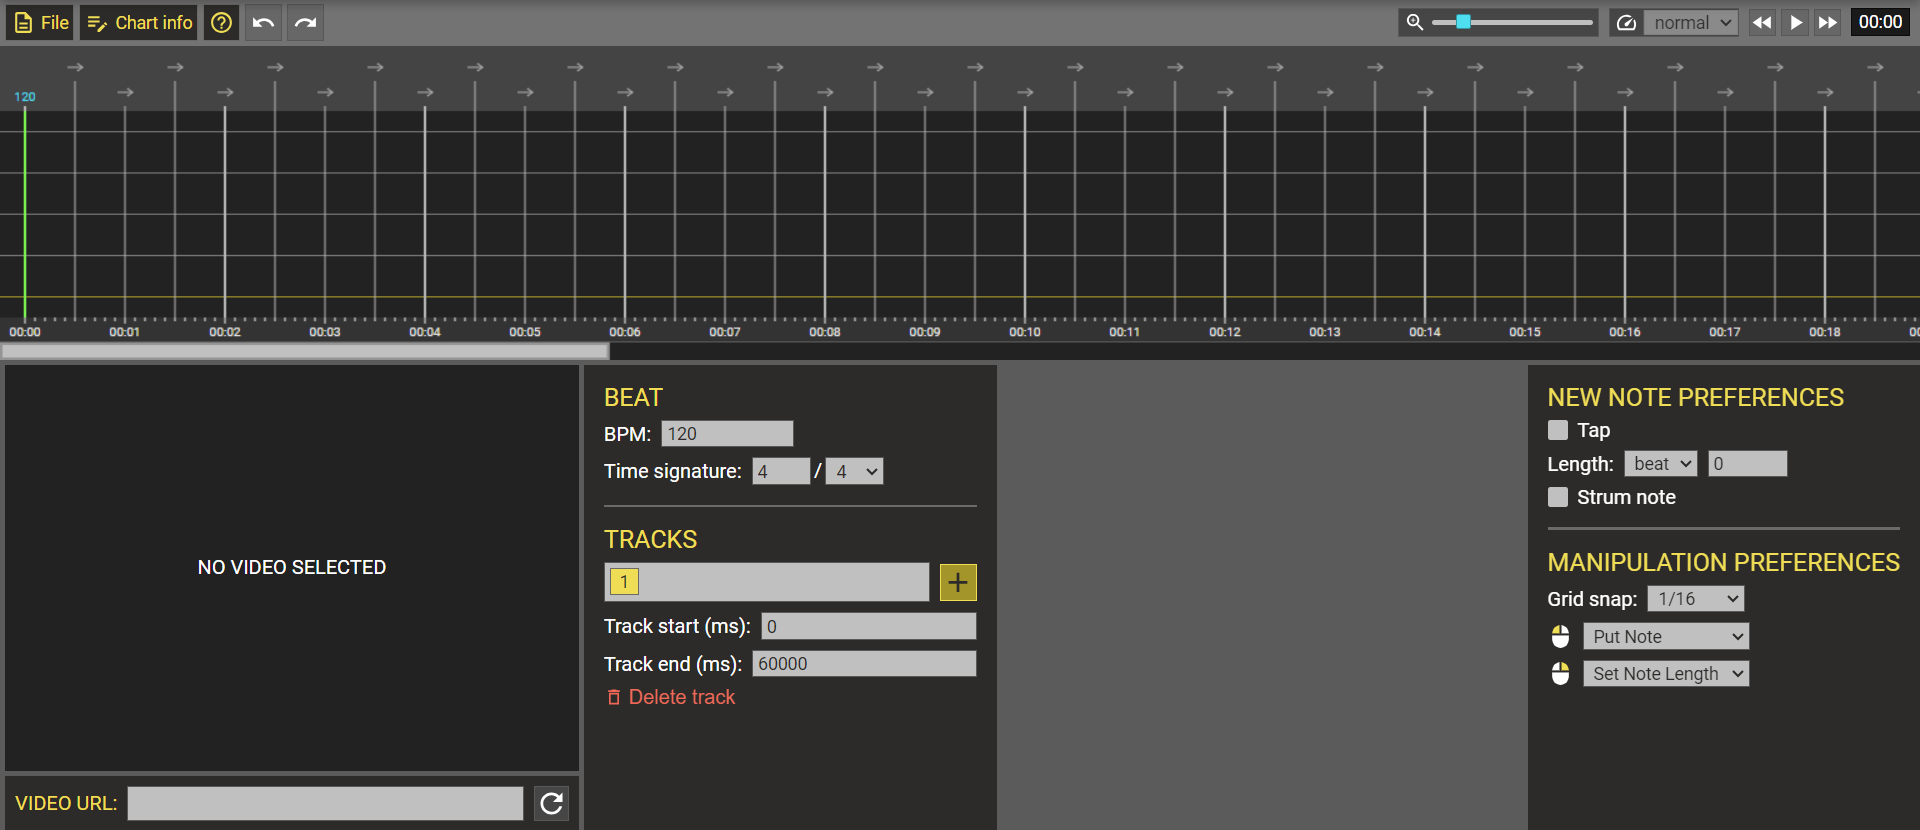
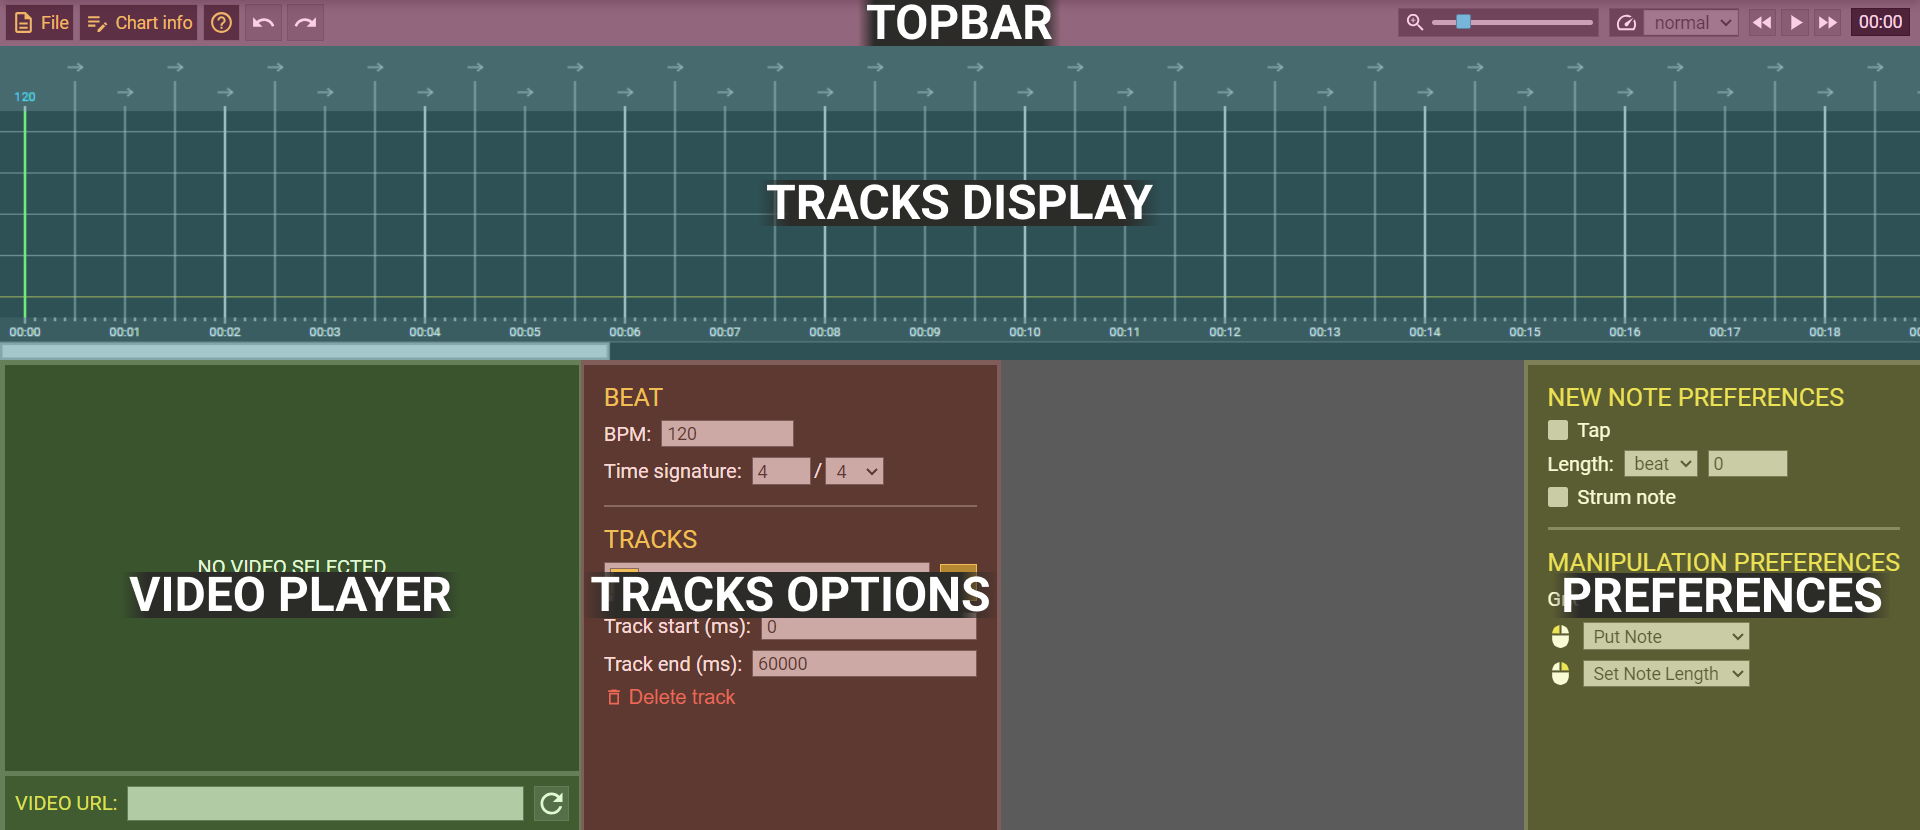
Editor's interface is separated into 5 main parts:
The following picture shows where the individual parts are located. It may look a little different depending on the size of the browser window.
Topbar
Topbar is divided into left and right part and contains various buttons and inputs.

The left part contains following buttons (from left to right):
- File button: opens file window
- Chart info button: opens chart info window
- Help button: opens manual
- Undo button: undoes the last action
- Redo button: redoes last undone action
The right part contains following inputs and buttons (from left to right):
- Zoom input: changes zoom of tracks display
- Playback rate input: changes playback rate of video player
- Rewind button: rewinds the video (if ctrl is pressed when clicking the button, it will rewind a smaller step and if shift is pressed, it will rewind a bigger step)
- Play/pause button: plays/pauses video player
- Forward button: fast forwards the video (if ctrl is pressed when clicking the button, it will fast forward a smaller step and if shift is pressed, it will fast forward a bigger step)
- Time display: displays the current video playback time
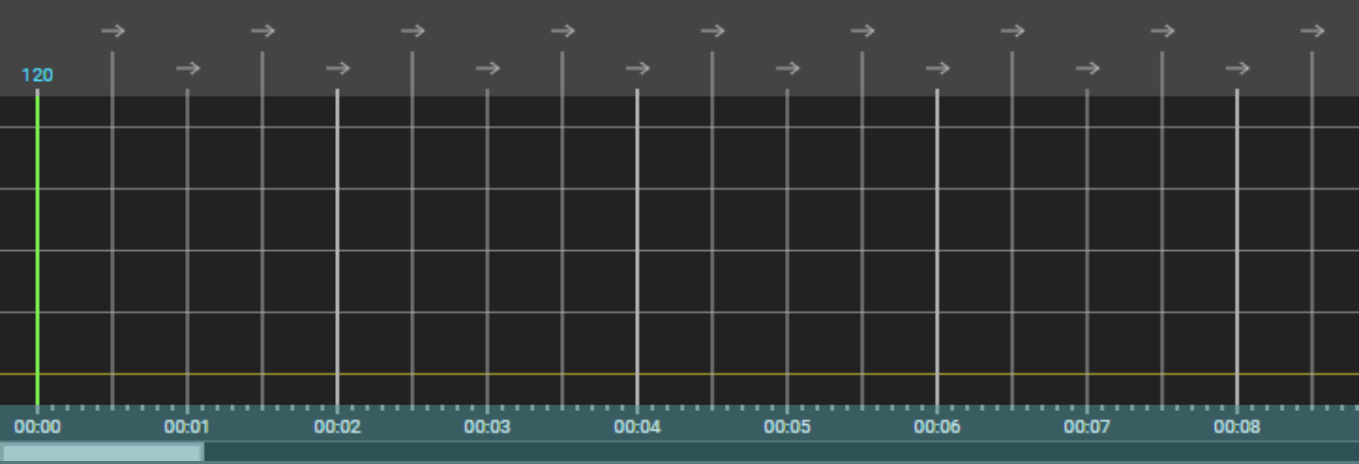
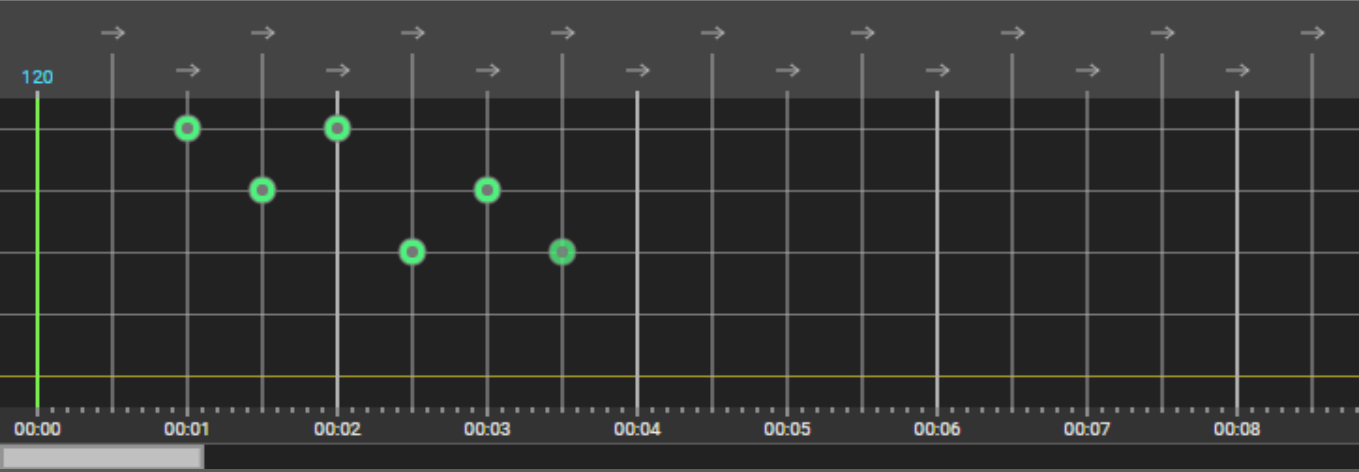
Tracks display
Tracks display is used to display created tracks and to edit them.
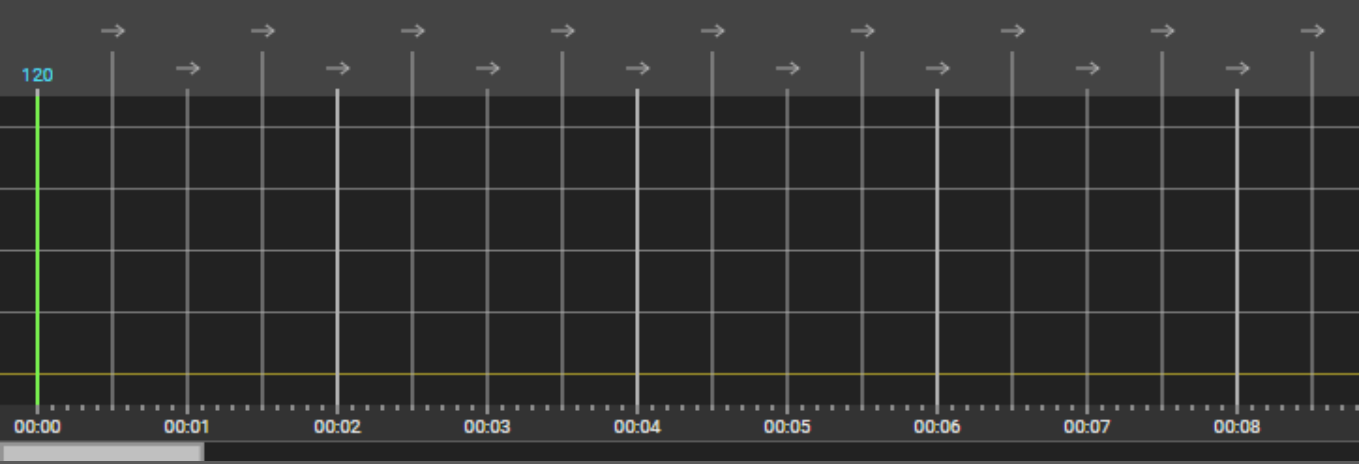
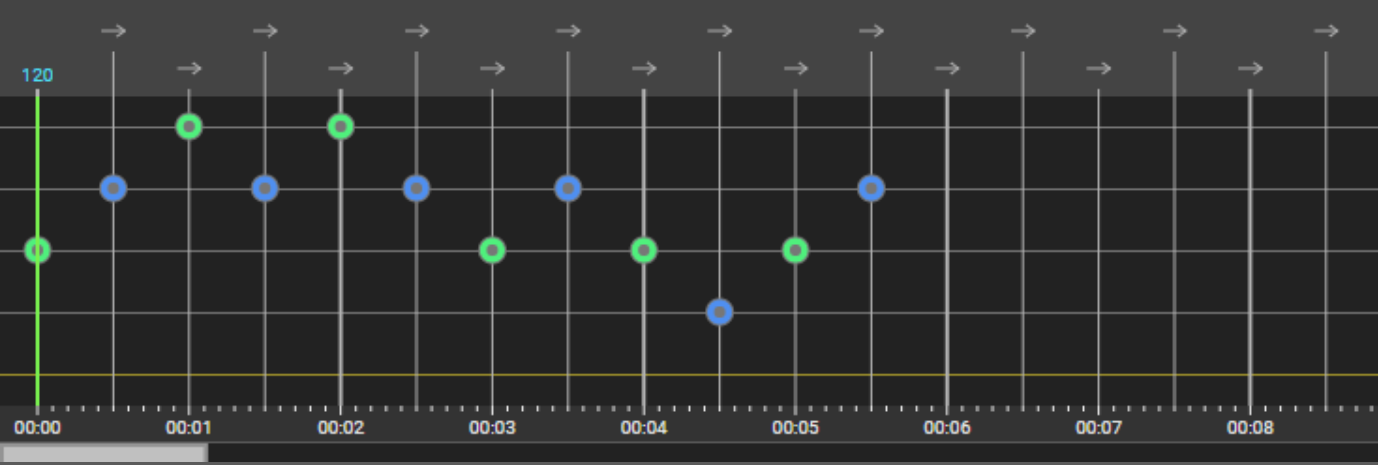
After starting the editor, there is one track that is automatically created. More tracks can be created in tracks options section. Currently selected track is displayed with extended beat lines as shown in the following picture and can be edited.

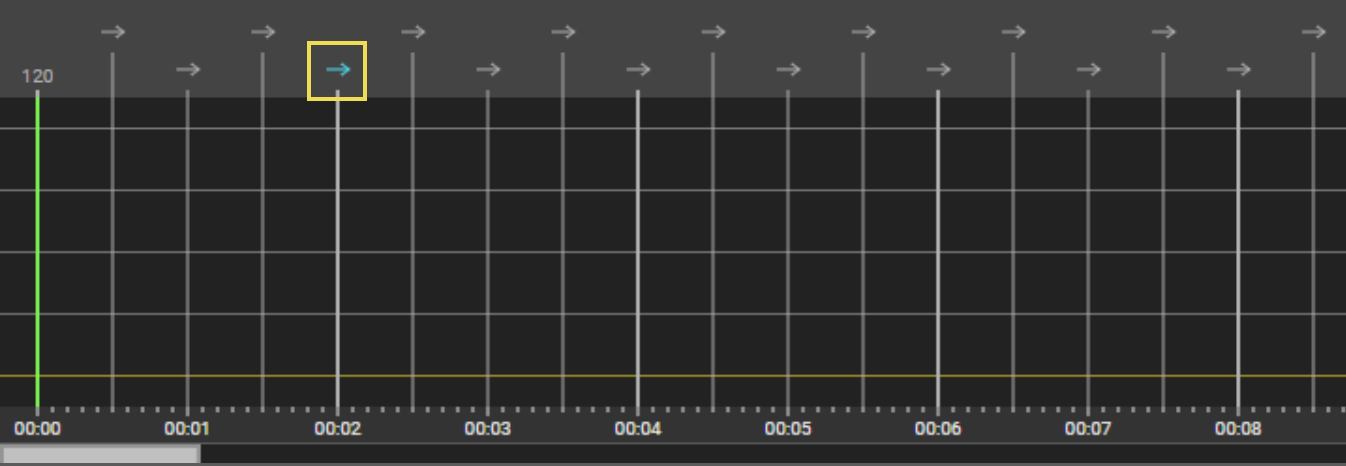
To change BPM or time signature at specific beat of track, the beat must first be selected. This can be done by clicking on the arrow or number above the beat line. Then the BPM or time signature can be changed in the tracks options section.
By default, Put Note tool is selected for mouse left button. So when you click on a place in the track, a note will be placed. For mouse right button is by default selected Set Note Length tool. So by clicking on a note and dragging on the track, you can set the length of the note. Tools for mouse buttons can be changed in manipulation preferences section. More information about mouse tools is available in mouse tools section of this manual.
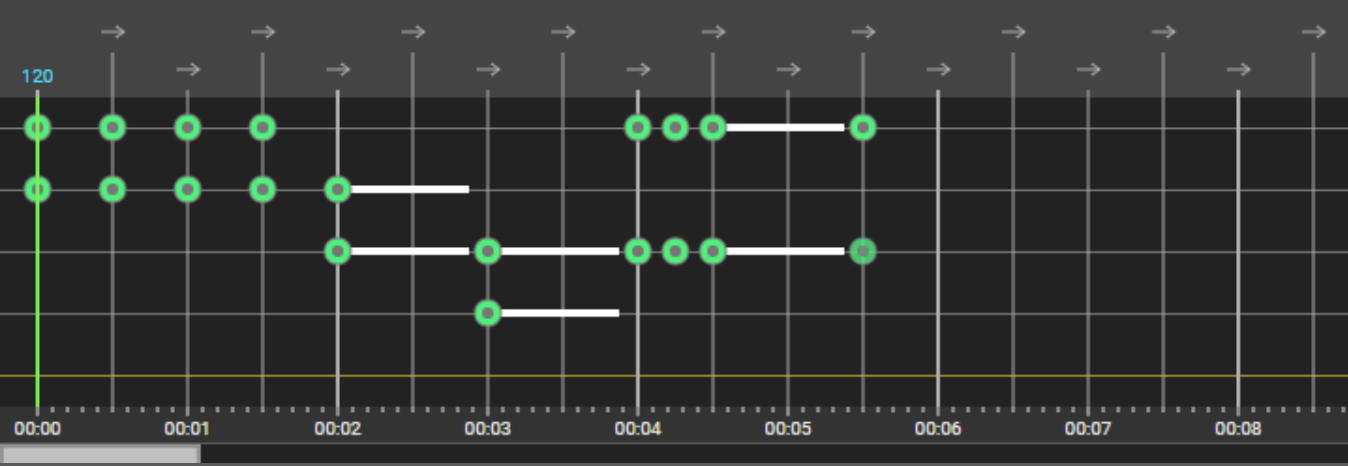
At the bottom of tracks display is a timeline and below that is a scrollbar that can be used to scroll the tracks display. In addition, the mouse wheel can also be used to scroll.
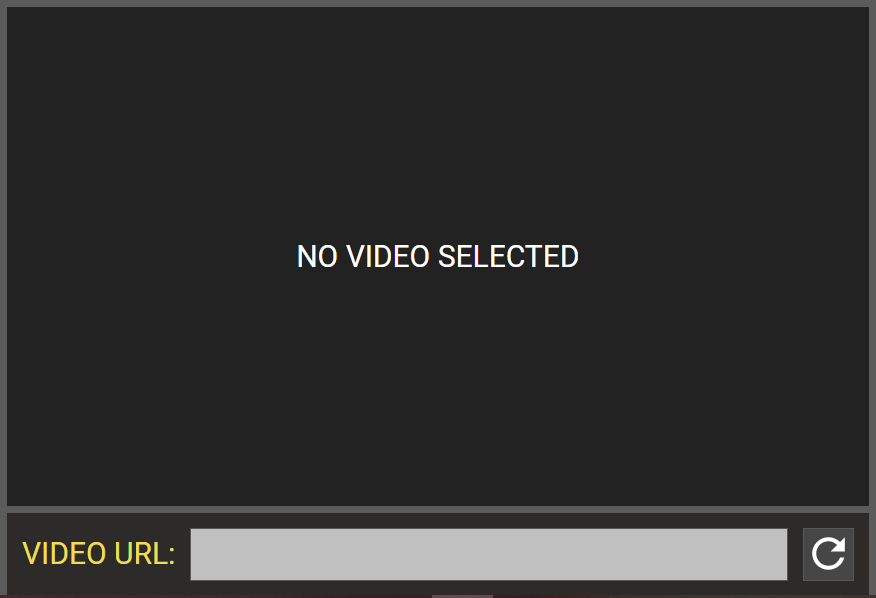
Video player
Video player contains YouTube video and input to change the video. Just paste the URL of the video and click the refresh button.
Tracks options
Tracks options section consists of two parts: beat and tracks.
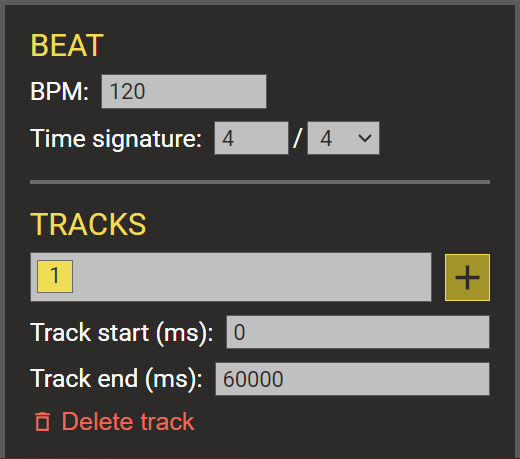
Beat part contains following inputs:
- BPM input: changes BPM at selected beat in tracks display
- Time signature input: changes time signature at selected beat in tracks display
Tracks part contains the following:
- Tracks container: displays buttons for all tracks and allows you to select specific track
- Add track button: adds a new track
- Track start input: changes start of track
- Track end input: changes end of track
- Delete track button: deletes currently selected track
Preferences
Preferences section is divided into two parts: new note preferences and manipulation preferences.
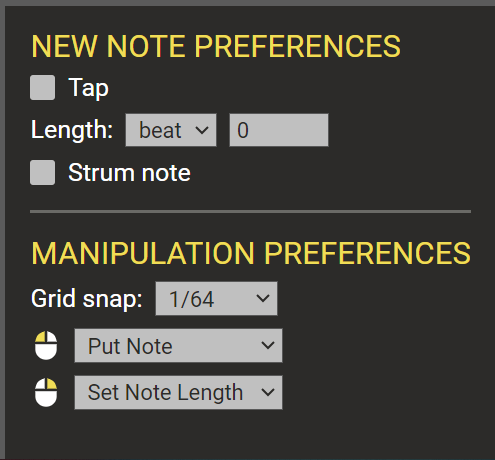
New note preferences have the following inputs, that can be used to set what the newly put note should be:
- Tap checkbox: determines whether note should be tap note
- Length: determines the length of note (in beats or miliseconds)
- Strum note checkbox: determines whether note should be strum note (tap and length options don't matter if this checkbox is checked)
Manipulation preferences part contains the following inputs:
- Grid snap input: changes grid snap for tracks display
- Mouse left button input: changes tool for mouse left button
- Mouse right button input: changes tool for mouse right button
File window
File button in topbar opens file window. This window contains options to save/load chart.
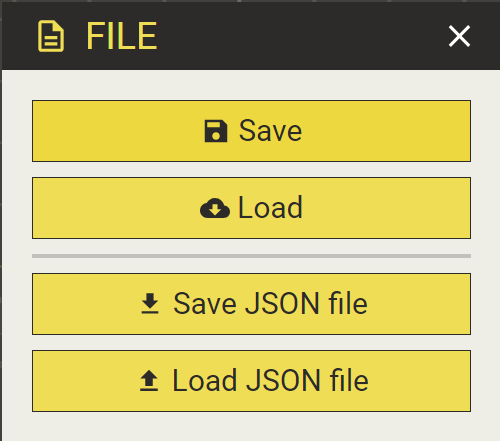
There are 4 buttons, the first 2 of which are not visible for anonymous users.
- Save button: saves chart to users's private songs on server
- Load button: opens window to load chart from user's private songs
- Save JSON file button: saves (downloads) chart as JSON file
- Load JSON file button: loads chart from JSON file
After user saves chart to his private songs, there will also appear "Save as new" button. This button can be used to save currently opened chart from user's private songs as new.
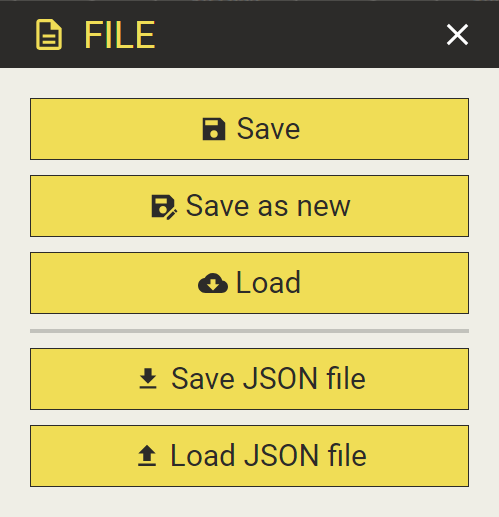
Chart info window
Chart info button in topbar opens chart info window. This window is used to set chart information like song name, artist, genre and so on.
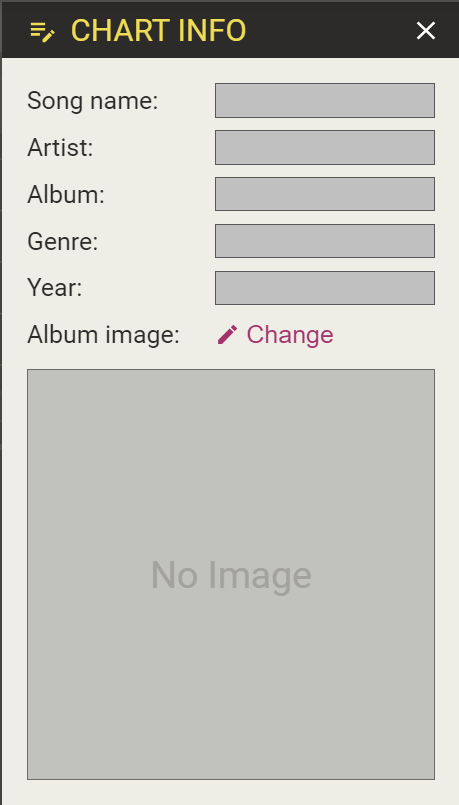
To change album image, click change. A window will then appear where you can search for and select an image.

Context menu
If notes or note powers are selected, context menu is displayed between tracks options and preferences sections. This menu can be used to edit selected notes and note powers.
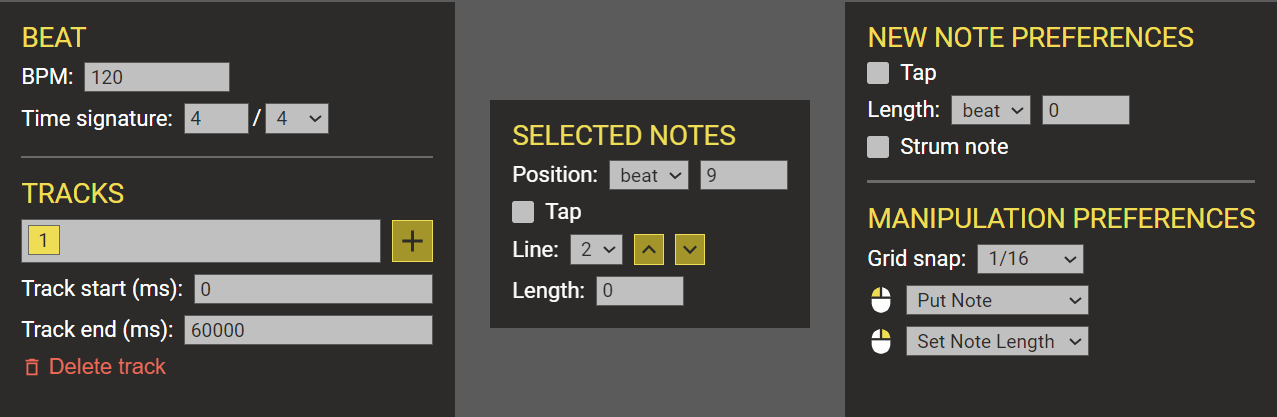
Based on the selected items, some or all of the following inputs will be displayed:
- Position input: changes position of selected notes and note powers (displayed only if the selected items are located at the same position)
- Tap checkbox: determines whether selected notes should be tap notes (displayed only if all of the selected notes are or are not tap notes)
- Line input: changes line of selected notes (if not all selected notes are located at the same line, only buttons are displayed)
- Length input: changes length of selected notes and note powers (displayed only if the selected items have the same length)
Mouse tools
There are different tools for mouse buttons, that can be selected in manipulation preferences section. There is a tool to put notes, set notes length, select notes and so on. But better than to change mouse tools in manipulation preferences is to use keyboard shortcuts.
Put note
Put note tool is used to put notes. After clicking on a place in track, note will be placed there.
Set note length
Set note length tool is used to set length of notes. By clicking on a note and dragging on the track, length of note can be set. If shift is pressed while clicking on note, length will be set for all notes at the same position together.
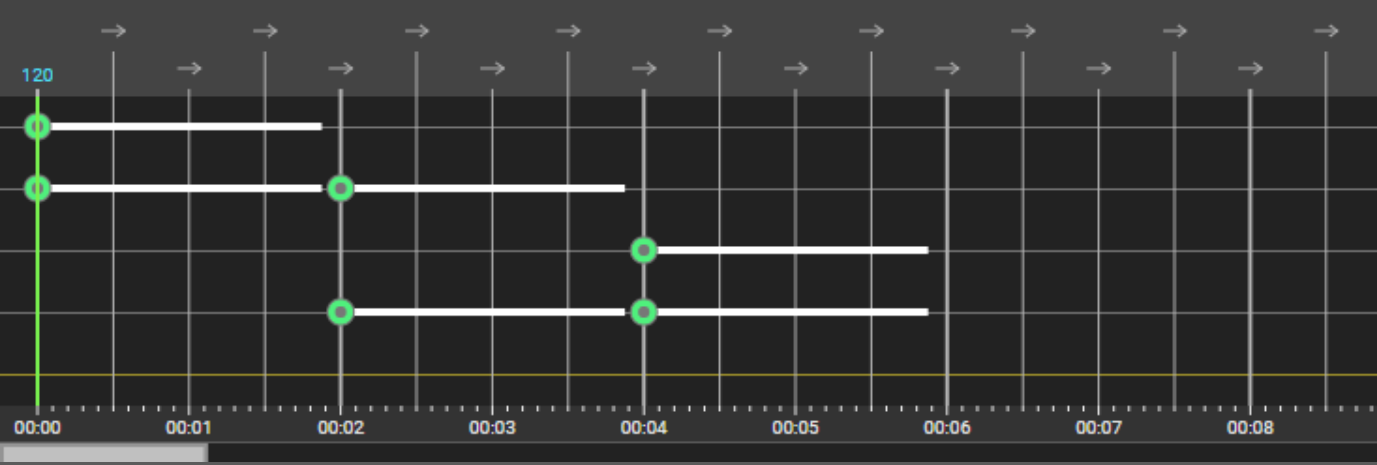
Select
Select tool is used to select notes by clicking on the track and dragging. If shift is pressed while clicking, already selected notes will remain selected.

Select note
Select note tool is used to select notes by clicking on them. if shift is pressed while clicking, already selected notes will remain selected.
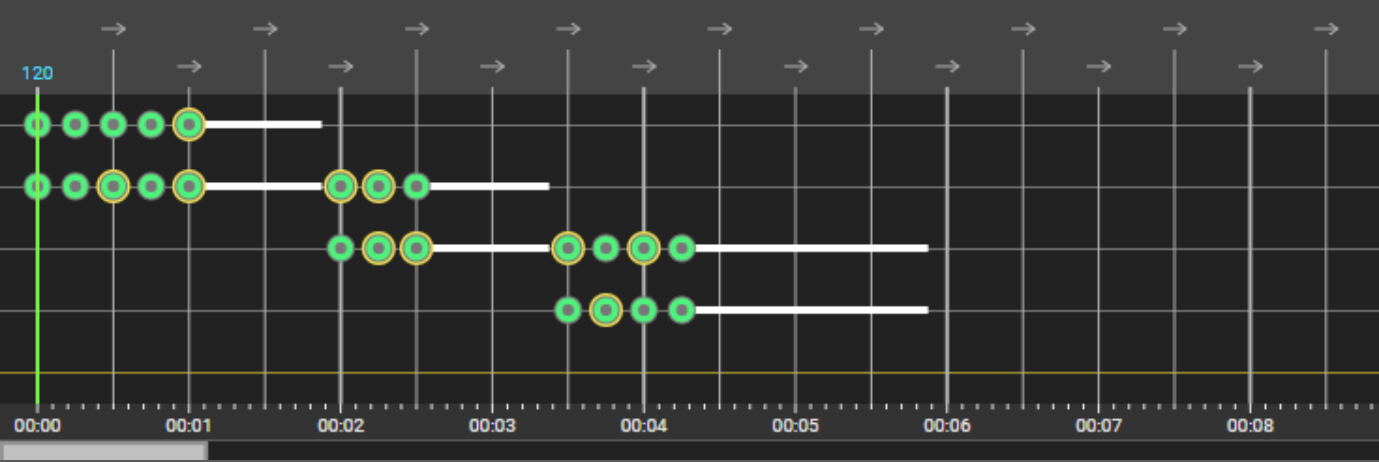
Toggle tap note
Toggle tap note tool is used to toggle tap notes by clicking on them.
Delete note
Delete note tool is used to delete notes by clicking on them.
Keyboard shortcuts
Using the editor without any keyboard shortcuts is cumbersome. At least the keyboard shortcuts for mouse tools should be known by every user who decides to use the editor.
Mouse tools
- alt + mouse left button: use select tool
- alt + mouse right button: use delete tool
- mouse middle button: use toggle tap note tool
- alt + mouse middle button: use select note tool
Manipulation of notes
- ctrl + z: undo last action
- ctrl + shift + z: redo last undone action
- ctrl + c: copy selected notes
- ctrl + v: paste selected notes at selected beat
- ctrl + a: select all notes of selected track
- ctrl + x: cut (copy and delete) selected notes
- delete: delete selected notes
- arrow up: move selected notes up (change line)
- arrow down: move selected notes down (change line)
New note preferences
- c: toggle tap note for new notes
- v: toggle strum note for new notes
- x: toggle between miliseconds and beat units for the length of new notes
Manipulation preferences
- e change grid snap down
- r change grid snap up
- a change tool for mouse left button to put note tool
- s change tool for mouse left button to set note length tool
- d change tool for mouse left button to select tool
- f change tool for mouse left button to select note tool
- g change tool for mouse left button to toggle tap note tool
- h change tool for mouse left button to delete note tool
- alt + a change tool for mouse right button to put note tool
- alt + s change tool for mouse right button to set note length tool
- alt + d change tool for mouse right button to select tool
- alt + f change tool for mouse right button to select note tool
- alt + g change tool for mouse right button to toggle tap note tool
- alt + h change tool for mouse right button to delete note tool
Track
- shift + a: add new track
- shift + page up: select next track
- shift + page down: select previous track
- page up: select next beat
- page down: select previous beat
Playback
- space: play/pause video
- arrow left: rewind video
- ctrl + arrow left: rewind video by smaller step
- shift + arrow left: rewind video by bigger step
- arrow right: fast forward video
- ctrl + arrow right: fast forward video by smaller step
- shift + arrow right: fast forward video by bigger step
- q: slow down playback rate
- w: speed up playback rate
Zoom
- +: zoom in tracks display
- -: zoom out tracks display
Saving
- ctrl + s: save
- ctrl + alt + s: save as new
Windows
- ctrl + f: open file window
- ctrl + i: open chart info window